
Ranger Beast Master Build - Baldur's Gate 3 (BG3)
Contents
Beast Master Ranger Build
The build at its core is a ranger. This means that you are versatile with using various weapons and are effective in combat. Although you do not get as many direct benefits as other subclasses - Gloom Stalker or Hunter.
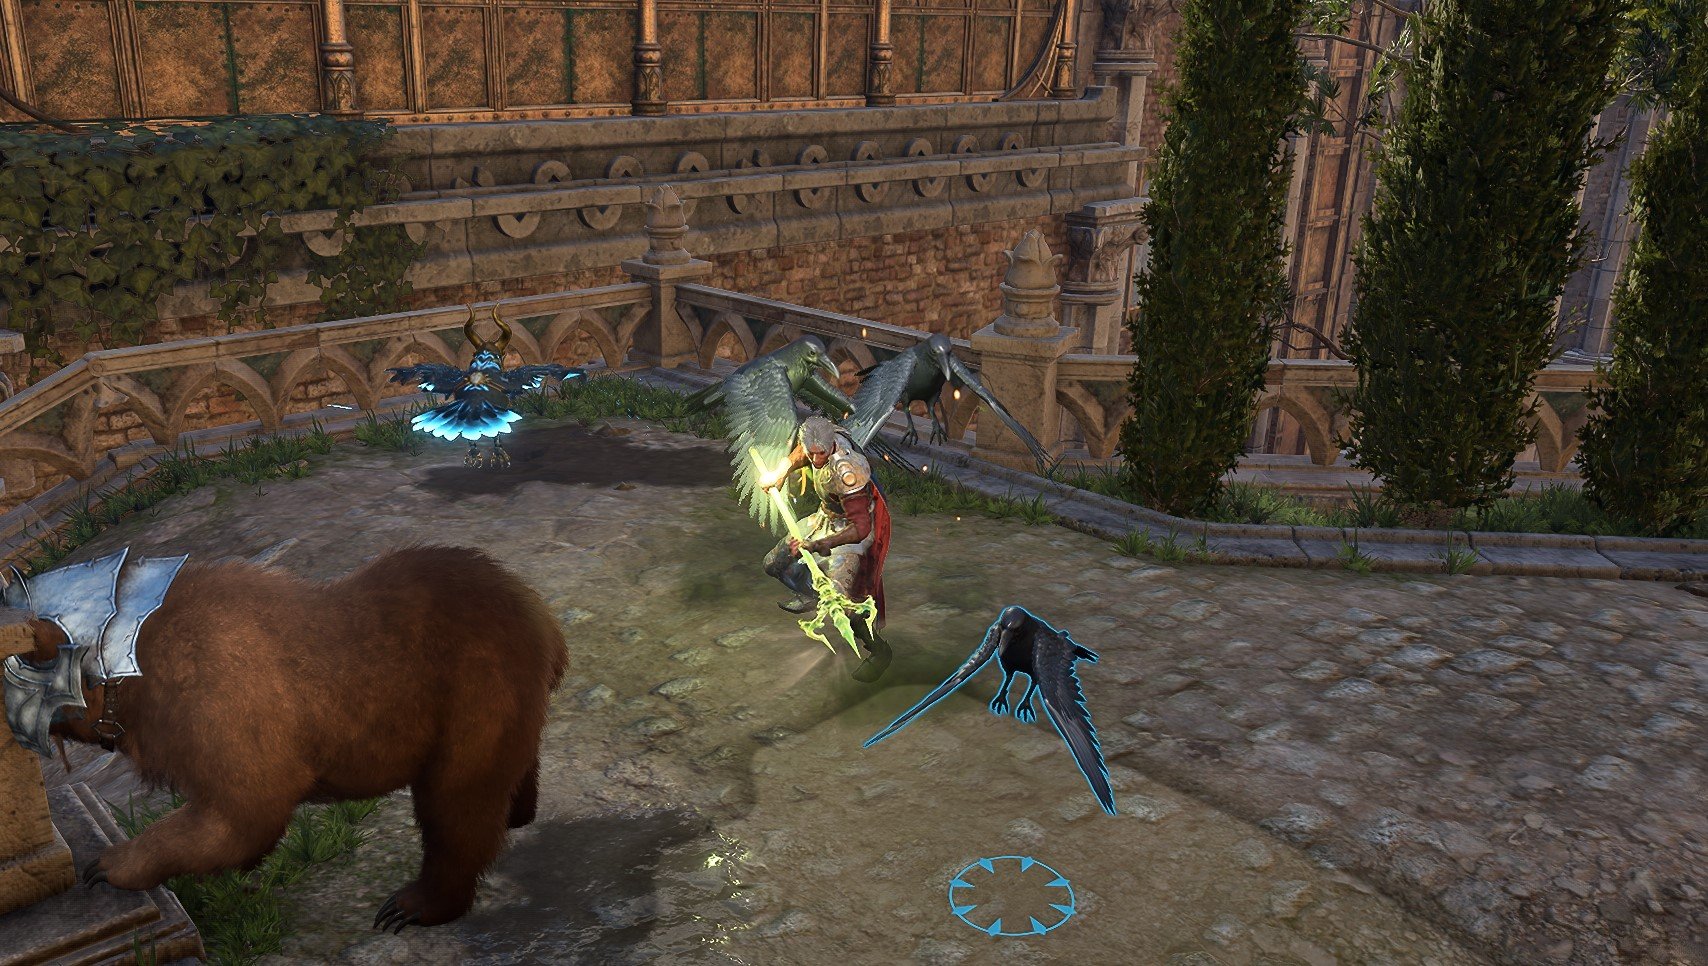
However, where you shine, is being able to call help from your beast companions with ![]() Ranger's Companion. At first, they are okay, but as you level up, they get additional features. The top potential is reached at level 11 with
Ranger's Companion. At first, they are okay, but as you level up, they get additional features. The top potential is reached at level 11 with ![]() Bestial Fury.
Bestial Fury.
There are some very powerful actions that your summons can do - disarm enemies, call for help, create fields of darkness, or summon a spectral sword with your wolf. Cool, right?
I would like to add a unique twist to the build and go with Two-Handed weapons. The build works perfectly with Ranged ones, but I think this gives something interesting to play around. I will, of course, include a section on how to do this with a bow if you are interested.
Thank you to Rookie [Magus Amogus] for optimization tips regarding abilities from Larian BG3- Builds discord.
Leveling Overview
Here is a concise table with all the main picks during your leveling progression. For more detailed reasoning, I go further in the article. Also, do not forget to check the recommended gear as it is crucial.
| Level | Class | Selection |
|---|---|---|
| 1 | Ranger 1 | STR - 17, DEX - 10, CON - 16, INT - 8, WIS - 14, CHA - 8 |
| Skills: Animal Handling, Perception, Insight, Medicine | ||
| Favoured Enemy: |
||
| Natural Explorer: |
||
| 2 | Ranger 2 | Spells: |
| Fighting Style: |
||
| 3 | Ranger 3 | Spells: |
| Subclass: Beast Master | ||
| Scribe Spells: |
||
| 4 | Ranger 4 | Feat: |
| 5 | Ranger 5 |
Spells: |
| 6 | Ranger 6 | Favoured Enemy: |
| Natural Explorer: |
||
| 7 | Ranger 7 | Spells: |
| 8 | Ranger 8 | Feat: Ability Improvement +2 Strength |
| 9 | Ranger 9 | Spells: |
| 10 | Ranger 10 | Favoured Enemy: |
| Natural Explorer: |
||
| 11 | Ranger 11 | Spells: |
| 12 | Ranger 12 | Feat: |
Starting the Game - Level 1
This section covers the creation screen and what would go into the best Races, Abilities, and Skills for the Beast Master build. Some of these choices are impactful as you cannot respec them.
Races
Picking a race provides various benefits - abilities, dialogue options, looks, etc. Also, keep in mind whether your picked race has Shield proficiency as this can improve survivability, especially in the early game.
| Race | Features | Description |
|---|---|---|
 Dwarf Duergar Dwarf Duergar |
|
I love this choice |
 Wood Elf Wood Elf |
|
Comes with improved movement speed which is extremely useful for melee builds. |
 Wood Half-Elf Wood Half-Elf |
|
Comes with improved movement speed which is good, but extremely useful for melee builds. You can also equip a shield, which is great for improving AC early in the game. |
 Half-Orc Half-Orc |
|
A great choice, especially if you plan on going melee. The critical damage bonus is okay, but |
Class
| Overview | |
|---|---|
 Ranger Ranger |
|
| Rangers are unrivaled scouts and trackers, honing a deep connection with nature in order to hunt their favoured prey. |
Favoured Enemy
This is a set of abilities unique to the Ranger class. Based on your selection you can get new spells or unique effects against specific enemy types. Generally, anything works here based on your roleplaying choices. I would choose:
| Passive Feature | Description |
|---|---|
| I recommend this one at least when starting the game. You want the build to use Heavy armor, to accompany that low Heavy Armor. Later on, with some gear adjustments, this will become redundant. |
Natural Explorer
You also get these nature-related boons for the Ranger. These are based on the class experience in nature and how it can survive in different conditions. None of these provide any game-breaking bonuses so pick what you prefer:
| Feature | Description |
|---|---|
| Allows summoning a Familiar. They take animal forms and have unique effects both in combat and outside. You can use them for scouting or debilitating effects like blindness |
Background
Backgrounds are mostly for role-playing and you can pick whatever you prefer. If you want to optimize, then it would be good to pick backgrounds that are based on your ability points of Wisdom.
| Background | Skills | Description |
|---|---|---|
| Guild Artisan | Insight Persuasion |
A great choice, especially as you also get persuasion for better dialogue outcomes. |
| Folk Hero | Animal Handling Survival |
Useful choice, that gives two wisdom-related skill proficiencies. |
| Acolyte | Insight Religion |
A somewhat mixed bag. Insight is good, for some game situations, but religion is not related to many impactful things. |
| Outlander | Athletics Survival |
This is a somewhat okay choice. Sadly survival mostly shows places that can be dug, and once you see the roll, you can just dig them, even if it failed. So it becomes redundant. |
Abilities
Now let's take a look at the abilities of the best Beast Master build. Correct allocation will allow you to maximize the early gameplay and get good modifier bonuses.
| Ability | Value | Description |
|---|---|---|
 Strength Strength |
17 (15+2) | This will be the main ability that the build uses. It will give a good boost to damage output and unlock some great options for two-handed weapons. |
 |
10 | Although this primary ranger ability, I am leaving it low for now. The build will be using Heavy armor, for the start of the game, but it will have minor adjustments once you obtain |
 Constitution Constitution |
16 (15+1) | Having a good Constitution is useful both for survivability and keeping spell Concentration. |
 Intelligence Intelligence |
8 | No need for this ability. |
 Wisdom Wisdom |
14 | This is the main spellcasting ability of Ranger and some skill proficiencies will depend on it. |
 Charisma Charisma |
8 | Although it is important for dialogues, this would leave the Beast Master build weaker in other aspects. |
Skills and Expertise
Overall, the skills should be impacted by your roleplaying and background decisions. However, you would still want those that will give you the best benefits. My recommendations are to pick those at which you have a high ability modifier and these are Wisdom-related.
- Animal Handling - this is the mandatory one in my opinion as it fits the build theme so well.
- Insight
- Medicine
- Perception
- Survival
Leveling Progression - Levels 2-12
Here is the detailed progression for the Ranger Beast Master to get you started. You can use it as a guideline because early games can be daunting and overwhelming. Later on, once you get a feel for the class you can start picking your options
Level 2
This is where you will have left the tutorial area, and will start exploring the world.
Spells
| Spell | Description |
|---|---|
| A solid spell, that will be your go-to option for bonus action for at least a few levels. It gives bonus damage, which is a great improvement early in the game. | |
| I recommend getting this spell, as it is a Ritual one, and does not cost a spell slot to cast. Moreover, this can be used to buff up yourself, beasts, and companions. If you have someone else in the group who can cast it, feel free to take anything else. |
Fighting Style
Here, you can make a few important choices, that depend on your playstyle:
| Styles | Description |
|---|---|
| Take this option if going with melee, and specifically two-handed. The bonus armor class is a great boost. |
Optional Elixir of Hill Giant Strength progression
Well, there is a trick early in Act 1, after you reach the first settlement - Druid's Grove. There you can stock up on some really powerful potions for Acts 1, and 2 - Elixir of Hill Giant Strength.
What do they do? They increase the Strength to 21 until a Long rest. More or less this negates any need to have strength investment if you plan to use them till the late game. This is somewhat gimmicky. If you are interested here is a guide on how to farm Elixir of Hill Giant Strength.
With this option, you could set Strength to 8, and pump up that Dexterity. This would result in higher initiative, and you could wear Medium armor from the start of the game. So think about it.
Level 3
You can now choose a subclass for the build and gain additional goodies.
Spells
| Spell | Description |
|---|---|
| A decent action that also works with melee. |
Subclass
| Overview | |
|---|---|
 Beast Master Beast Master |
|
| Features | |
| Gives access to unique beasts with their unique set of actions and skills. | |
Replace Spell
Nothing to replace yet.
Level 4
Now, you get some other great choice picks - the first feat is unlocked.
Replace Spell
Nothing to replace.
Feat
| Feat | Description |
|---|---|
| This is the strongest feat if you are using two-handed weapons. First, it gives a bonus attack using a bonus action if you kill an enemy or land a critical hit. Second, it gives a big 10 damage boost, that comes with a -5 penalty to attack rolls. This is problematic in the early game but can be overcome in various ways. I recommend checking my guide on Attack Roll Increase, to get ideas on how to mitigate it. | |
| Ability Improvement | Get +2 Strength, which is a safe choice in my opinion. It increases the hit chance and gives +1 damage. Only take this if not using Strength Elixirs, otherwise, skip it. |
Level 5
This level is a major improvement for the Beast Master as the new class feature is unlocked - ![]() Extra Attack. This almost doubles your damage output per single turn.
Extra Attack. This almost doubles your damage output per single turn.
| Feature | Description |
|---|---|
| Can make an additional free attack after making an unarmed or weapon attack. |
In addition, you also unlock the Beast Master feature:
| Feature | Description |
|---|---|
| A good improvement to the stats of your Companion. This is based on a proficiency bonus, which grows as you level up. |
Spells
Ranger can also now pick level 2 spells:
| Spell | Description |
|---|---|
| A good crowd control spell, that can easily just outright murder some of your foes. |
Replace Spells
If you stopped using or did not use any spells from the Level 1 spell list now is the perfect time to switch. I utilized them all, so decided not to take any replacements. I recommend checking these out:
| Spell | Description |
|---|---|
| Creates a sphere that silences enemies. Although they can move out from this, it will require them to waste their movement or even use Dash and skip the attack | |
| This spell can come in handy in some situations, so I recommend that at least one party member has it. It can remove paralysis, disease, poison, and blindness | |
| In the build context, this is not a huge improvement but can be welcome to have in some encounters where you want to sneak past with the whole group. |
Level 6
Overall, level 6, is nothing big. We get some additional choices for unique ranger bonuses. However, there is one thing that I would like to cover and I think is the perfect time:
Level 1 Dips for the Build
As I mentioned, the build can accommodate level 1 dips into a class via multiclassing. This can be helpful to improve some aspects of Beast Master, but overall, it won't give anything huge. So here are a few options:
- Cleric (War Domain) - gives
 War Priest feature, allowing to attack with bonus action. Because you have
  Great Weapon Master: Bonus Attack, this is not as important. You could also be interested in the
  Guidance spell, which is usually cast by a cleric (if you do not have one).
 - Sorcerer - it gives access to a few level 1 spells, one powerful is
 Shield. Moreover, you can pick a few utility cantrips like
  Friends to help with dialogues.
So level 6 is a perfect time to take this 1-level dip. But, you will be delaying an upgrade to your companion's upgrade to level 12. You can also do this dip at level 12, instead of level 6.
Favoured Enemy
You can pick any 1, my recommendations:
| Feature | Description |
|---|---|
| You get a spell - |
Natural Explorer
Pick one of the below:
| Feature | Description |
|---|---|
| Could be a good choice, if you would like to concentrate on making Beast Master the main pick locker and trap disarmer. | |
| Fire spells are abundant throughout the game. Getting resistance to them will give a big survivability boost. |
Replace Spell
Nothing to replace for now.
Level 7
Overall, nothing significant at this level, just general progression with some bonuses.
| Feature | Description |
|---|---|
| Overall, a good upgrade, that can help you with picking up downed allies using the summon, instead of the main characters. |
Spells
As the core, of the spells are picked, you can choose anything that you prefer. I would go with:
| Spell | Description |
|---|---|
| In the build context, this is not a huge improvement but can be welcome to have in some encounters where you want to sneak past with the whole group. |
Replace Spell
Nothing to replace.
Level 8
The main highlight of this level is the 2nd feat. The build is slowly but steadily reaching its full potential.
| Feature | Description |
|---|---|
| Great passive, that will be especially useful for the melee approach of this build. |
Replace Spell
Nothing to replace now.
Feat
| Feature | Description |
|---|---|
| This is mandatory if you have not taken it at level 4. The damage boost of 10 is very important. | |
| Ability Improvement | Take the +2 Strength, to maximize your damage output. Skip this if you are using Strength Elixirs. |
| Another option so that you would be guaranteed to always go first and avoid any surprise rounds with ambushes. |
Level 9
The ranger gets access to its highest tier spells - level 3.
Spells
| Spells | Description |
|---|---|
| I recommend this spell as it does not use a Concentration slot. Overall it's a solid action to have in an arsenal. You can combine this with other similar spells like |
Replace Spell
Generally, you could take any level 3 spell and switch to something that you do not use, as the next spell will be accessed only at level 11. Here are some choices that are good to get:
| Spells | Description |
|---|---|
| A solid damage spell that attacks in a wide code. The good thing is that you cannot miss using this action. | |
| Great spell in some situations. You can use it to illuminate areas and get the effect of |
Level 10
Unlock class-related passives and features of Ranger.
| Action | Description |
|---|---|
| Become invisible, however, this is inferior to what Gloom Stalker and Shadow Monk have access to, as you cannot move while invisible. |
Favoured Enemy
At this stage in the game, it won't matter much what you pick.
| Feature | Description |
|---|---|
| The Investigation proficiency is useful, otherwise nothing special. |
Natural Explorer
Pick any of the options.
Level 11
This is the major level where you unlock the full potential of your companions. Be sure to check the mechanics section lower in the guide, where I explain their mechanics.
| Feature | Description |
|---|---|
| Companions gain |
Spells
| Spells | Description |
|---|---|
| A decent option to hide enemies in a wide area. |
Replace Spell
For spell replacement, I don't think it is needed, feel free to try out something if you would like.
Level 12
The final level of the build. As I mentioned before, you can use this to take a dip into War Domain Cleric or Sorcerer for some additional goodies. However, this only holds if you do not need a third feat.
Replace Spell
You can replace any of the spells, I leave this to your discretion.
Feat
Be sure to have other two feats mentioned earlier - ![]() Great Weapon Master: All In and Ability Improvement +2 Strength (if not using Strength Elixirs)
Great Weapon Master: All In and Ability Improvement +2 Strength (if not using Strength Elixirs)
| Feats | Description |
|---|---|
| Excellent feat to be taken late into the game. It gives about 30% more damage to your damage rolls. | |
| If you did not take this, you can get it for an increased initiative and being able to take a turn on Surprise rounds. |
Maximizing Ability Scores
Now, as the build progression is covered there are a few aspects and important decisions you will have to make throughout the game. These will decide your final score for abilities.
- Act 1 - Auntie Ethel Hair - you will want to get +1 Strength if you pick this choice.
- Feat - Ability Improvement - +2 Strength
- Act 2 - Potion of Everlasting Vigour - +2 Strength.
- Act 3 - Mirror of Loss - pick +2 Strength.
This will allow you to reach 24 natural Strengths. The only way to reach it higher is using the Elixir of Cloud Giant Strength, this will result in 27 Strength.
Potions, Elixirs and Consumables
Let's take a look at what consumables you can use to further empower the build.
Potions
These are general consumables, and most of them are activated for a few turns. Potions are separate from Elixirs and can be active together.
| Consumable | Description |
|---|---|
 Oil of Accuracy Oil of Accuracy |
Gives +2 to attack rolls, which minimizes the negative impact from |
 Diluted Oil of Sharpness Diluted Oil of Sharpness |
Gives a bonus attack roll and damage. It is a good coating if you can apply it before combat. |
 Potion of Speed Potion of Speed |
You can chug this potion before combat, or during combat using bonus action. It gives another action point that gives an additional attack or one more spell cast. Sadly its duration is only 3 turns. |
 Potion of Animal Speaking Potion of Animal Speaking |
Although not something powerful, it is worth stocking up and saving a spell slot. |
 Potion of Invisibility Potion of Invisibility |
Can be used to get a perfect position before the encounter starts. |
Elixirs
Unfortunately, only one Elixir can be active at a time. However, the good thing is that they last until a long rest, making them very useful and economical.
Be sure to activate them before combat as otherwise, you will need to use Bonus Action.
| Consumable | Description |
|---|---|
 Elixir of Bloodlust Elixir of Bloodlust |
As you will be able to easily kill at least the weakest foe, this ensures additional attacks per turn. I would go with this option once you have 22 base strength, otherwise look at the options below. |
 Elixir of Vigilance Elixir of Vigilance |
For some encounters, you will want to go first. This elixir will ensure that it overcomes even surprise mechanics. |
 Elixir of Hill Giant Strength Elixir of Hill Giant Strength |
Sets strength value to 21 until the Long Rest. With this option, you can easily gimp on strength in the early game. You can put those points in Dexterity or Strength. Here is a farming guide for Elixir of Hill Giant Strength |
| Elixir of Cloud Giant Strength |
An upgraded version that is available mostly in Act 3 via crafting or purchasing. Sets Strength to 27, the highest value possible. if using this one, you could set the strength to 8 via respec. |
Illithid Powers
This special mechanic in Baldur's Gate 3 allows you to consume tadpoles and unlock special Illithid Powers. These range from somewhat useful, to extremely deadly. I would like to leave a few recommendations:
Base Illithid Powers
| Order | Illithid Power | Description |
|---|---|---|
| 1 | Beneficial power to take as it does not have any costs, and provides only benefits on the first hits. | |
| 2 | Amazing passive feature that grats a critical hit without any requirements once per long rest. | |
| 3 | Taking only for progression, to unlock the next power. | |
| 4 | Passive feature that does not cost anything and automatically deals bonus psychic damage around the target, once it is close to death. | |
| 5 | A decent use for reaction to deal some bonus psychic damage. | |
| 6 | Taking it for progression | |
| 7 | Taking for progression, to unlock the next power, but it also provides a good bonus as temporary health, that can be cast before combat. | |
| 8 | Mainly taking for progression. |
Elite Illithid Powers
These become unlocked later in the game as you progress. They are extremely powerful additions to the build.
| Order | Illithid Power | Description |
|---|---|---|
| 0 | Automatically unlocked. You can use this to initiate attacks of opportunity without spending any movement. | |
| 2 | Removes any cost of spell slots or consumable resources. | |
| 3 | Extremely valuable power that can also help other casters to use up their Bonus action effectively. | |
| 4 | Great action, that can negate spell casting of some foes. | |
| 5 | A decent buff to improve dialogue outcomes. Especially helpful due to the low Charisma of the build. |
Equipment Recommendations
Now I would like to go through some gear recommendations to maximize the Best Beat Master Build. Items are especially important as they take the build to the next level thanks to their unique effects.
The key item to optimize this build is ![]() Gloves of Dexterity. They set your Dexterity to 18, allowing you to wear some powerful medium armor. Also, in the late game, you can access
Gloves of Dexterity. They set your Dexterity to 18, allowing you to wear some powerful medium armor. Also, in the late game, you can access ![]() Bhaalist Armour, but without good Dexterity, you will suffer with a low armor class.
Bhaalist Armour, but without good Dexterity, you will suffer with a low armor class.
However, if you plan on using these gloves elsewhere, you can continue playing with the initial setup, and use Heavy armor throughout the playthrough.
Act 1
The game beginning will be interesting. First, you will need to obtain some kind of Heavy Armor, to have a decent Armour Class with only 10 Dexterity.
| Slot | Item | Description |
|---|---|---|
 Melee (Two-Handed) Melee (Two-Handed) |
I like using this sword, as it has its unique action Phalar Aluve: Shriek. What makes it special is that you will have two beast companions there would be an additional 2d8 damage every turn. | |
| Solid choice as it increases the critical chance and provides an advantage on attack rolls. | ||
| One of the best greatswords that you can get in Act 1. The bonus to attack rolls is great for counteracting |
||
| A solid greatsword, that gives bonus armour class with |
||
 Ranged Ranged |
Gives bonus initiative, allowing one to go earlier in combat. I recommend this for the early games, as you will have low dexterity. | |
| Equip two of these so that you can attack with your bonus action. This is an amazing weapon as you can use bonus action to break water bottles to apply wet. | ||
 Head Head |
This is the best helmet in terms of damage improvements. It activates off Threatened status. | |
| I think the melee aspect of the build greatly benefits from this helmet, so I recommend it. | ||
 Cloak Cloak |
- | Nothing really of note here. |
 Armor Armor |
The best heavy armor in Act 1. Gives good Armour class, and enemies cannot critically hit you. | |
| Becomes available at about level 4 in trader inventories. It has 17 Armour Class. | ||
| Although it is a common rarity, 16 Armour Class early in the game will be a solid option. | ||
 Gloves Gloves |
The best gloves for this build. With them equipped, you can decrease Dexterity to 8 via respec and put those points into any other ability. | |
| Very strong gloves as they give Advantage. It is the best way to counteract the |
||
| These are the best early-game gloves, giving you a +2 Armour class if you are not using a shield. | ||
| Defensive gloves to reduce the damage of incoming ranged attacks. | ||
 Boots Boots |
One of the best boots, giving a total advantage for movement on difficult surfaces. It also gives |
|
| These boots can allow you to move into key targets without getting hit with Opportunity attacks. | ||
| Good boots that allow moving without slowing down on difficult terrain. | ||
 Amulet Amulet |
This is a good amulet that can double your damage with a cost of bonus action. For example, it would work perfectly against bosses where |
|
| The only amulet in the game that gives direct damage increase, can be activated with a single health potion before combat. | ||
| Gives mobility improvement thanks to the |
||
 Rings Rings |
As you have some concentration spells, this ring can be easily activated for a little bonus damage. | |
| The best option for Act 1. The bonus Armour Class is a great boost for survivability. | ||
| A solid ring with a +2 acid damage bonus on your weapon attacks. | ||
| A good movement boost makes it easier to reach those targets. |
Act 2 - mid-game
For Act 2, you will be dropping that heavy armor for some great medium ones. Some of the items will still be the best ones even if they are from Act 1.
| Slot | Item | Description |
|---|---|---|
| Melee (Two-Handed) |
This is a very strong weapon, you can start using it now, or wait till level 11 and unlock the improved Raven companion. After that, this will be an extremely powerful weapon. | |
| A strong weapon that has unique actions - |
||
| The sword is still a solid two-handed weapon choice through most of Act 2. | ||
| You can imbue a weapon with any element 1d4 damage and gain a +1 to attack rolls. You can get the bonus elemental damage on any weapon. For example, drop another weapon on the ground, cast the spell with this glaive, and equip the said weapon. This is a very powerful combo, although it may be a bug. | ||
| Ranged |
Amazing bow that allows to precast |
|
| Head |
This is the best helmet in terms of damage improvements. It activates off Threatened status. | |
| Cloak |
Improves survivability and Saving Throw success. You want to equip this cloak to maintain that good Armour Class. | |
| Armor |
Medium armor that will reach 19 Armour class together with |
|
| A solid heavy armour, that can take you to Act 3. | ||
| Gloves |
Still the best option to use if you can afford it. | |
| Gives a bonus of 1d4 damage, which is a good boost to melee damage. | ||
| Boots |
The boots are still the best ones you can equip. | |
| Optional boots if you need a little bit more Armour Class. | ||
| Amulet |
Allows casting a |
|
| Rings |
I would say this is the best Ring, that you can get, to eliminate the effect of |
|
| Still a good ring to use, for easy +2 damage. | ||
| If you are using Concentration spells, this would give 0.5 more damage than |
Act 3 - Final Build setup
This is the last act of the game, where you will get access to the most powerful items. To get them as early as possible you will need some planning, but overall, it should not be a problem.
| Slot | Item | Description |
|---|---|---|
| Melee (Two-Handed) |
A truly powerful weapon that gives a 1d6 thunder damage bonus. Moreover, it comes with unique weapon actions that can inflict bleeding and knockback foes. This is the best weapon to use if you plan on equipping |
|
| The strongest greatsword in the game. It gets a big damage boost from your strength modifier. | ||
| If you plan on utilizing the Darkness effect from Corvus Celer (Raven), this spear is a perfect match. It gives blindness immunity and bonus damage while being obscured. | ||
| Ranged |
Improves critical range for attack rolls. | |
| I would pick this bow if you are using Heavy Armour. The bonus initiative would be a huge boost to do some damage early in the turn. | ||
| Head |
This helmet synergizes well with |
|
| This helmet is a great option if you want to fully utilize the Darkness from Corvus Celer (Raven) companion. You could then freely see in the magical darkness. | ||
| Increases critical range for attack rolls. | ||
| Great helmet that makes you immune to blindness and gives a Constitution saving throw advantage. | ||
| Cloak |
Great way to avoid attacks and reduce the chance of enemy attacks landing. | |
| Deal additional damage to the attackers. | ||
| Armor |
Best armor as it doubles damage with Piercing weapons. This includes weapons like |
|
| The best medium armor in the game. It also does not limit your Armour class bonus from dexterity. | ||
| If you are looking for solid heavy armor, this is the one to go with. It gives a big damage reduction with |
||
| Gloves |
The best gloves till the end of the game, to ensure high initiative and free up points for Strength. | |
| Gives bonuses to attack and damage rolls. | ||
| Very good gloves, but might be contested by other builds, specifically, martial ones. | ||
| Boots |
An alternative boot to |
|
| Amulet |
The only amulet that gives a direct damage boost. | |
| Could be used to improve the survivability of the Beast Ranger build. If using it remember to set your constitution to 8 using respec. | ||
| Rings |
The best Ring, that you can get, to eliminate the effect of |
|
| The ring could be used together with the Dire Raven darkness effect, in case you are not using other items that make you immune to blindness. | ||
| I used this till the late game, due to the uncompromised damage boost. |
Ranged setup
Of course, you may be interested in going all-in with a ranged setup. I may to a separate build for this in the future, but for now, this will have to do. The setup requires some adjustments and picking particular items.
Update ability points:
Set your ability scores: STR - 8, DEX - 17, CON - 14, INT - 8, WIS - 16, CHA - 10
Choose your weapons
| Slot | Item | Description |
|---|---|---|
| Ranged |
The best bow in the game if you plan on getting high strength value from Strength Elixirs or |
|
| A good bow with a critical range increase and bonus attack rolls. | ||
| The bow applies the frightened status on targets, making them immobile. |
And you are ready to go more or less for the game.
Build Mechanics
In this section, I would like to dive deep into how to play the Beast Master. This will help you utilize it to the fullest and correctly use various actions and spells throughout the game.
Important Mechanics and Combos
Let's go through key mechanics and tips on how to effectively use the build.
Familiars
These are initial summons that you can get early in the game from ![]() Find Familiar. I will not go too deep into these, but my general recommendation is to use Raven. None of them deal substantial damage, but the bird can make enemies Blind, allowing for higher attack rolls against them.
Find Familiar. I will not go too deep into these, but my general recommendation is to use Raven. None of them deal substantial damage, but the bird can make enemies Blind, allowing for higher attack rolls against them.
Beast Companions
Okay, these beasts are only accessible to the Beast Master subclass. They are okay at the start of the game, and become much stronger as you level up. To reach their full potential you need to be Ranger level 11.
All of them get bonus damage if the target is marked with ![]() Hunter's Mark.
Hunter's Mark.
| Beast | Description |
|---|---|
 Wolf Wolf |
In my opinion, this is the coolest-looking beast. However, I think it is fairly weak. The wolf does get access to some offensive attacks, but none of them give a big control advantage, especially in later levels. |
 Bear Bear |
At level 5, this summon becomes very powerful. It gets access to |
 Boar Boar |
Great companion to have as it has access to plenty of actions that offer both increased damage and some debuffing. For example, |
 Wolf Spider Wolf Spider |
One of the stronger beasts. It has two things going for it:
|
 Dire Raven Dire Raven |
I think this is the best companion to use. It can blind enemies, which is an extremely effective debuff. It can also curse foes with |
Phalar Aluve for buffing
In Act 1, I recommended using ![]() Phalar Aluve weapon. It gives a unique Shriek ability that you can buff all incoming attacks with 1d4 thunder damage. Now you also have two summons - familiar and ranger companion. So in total, you could do 4 attacks per turn which would result in additional 4d4 thunder damage (if all of them hit)
Phalar Aluve weapon. It gives a unique Shriek ability that you can buff all incoming attacks with 1d4 thunder damage. Now you also have two summons - familiar and ranger companion. So in total, you could do 4 attacks per turn which would result in additional 4d4 thunder damage (if all of them hit)
This is a solid damage boost, that is exceptionally good in Act 1 and most of Act 2. Later on, this falls, especially as the familiars will have low attack rolls.
Managing Great Weapon Master
One of the more important feats of the build is ![]() Great Weapon Master: All In. It gives a flat damage boost at the cost of decreased attack rolls. Generally, it is best to take this later in the game at level 8+, when you have higher attack bonuses and better gear.
Great Weapon Master: All In. It gives a flat damage boost at the cost of decreased attack rolls. Generally, it is best to take this later in the game at level 8+, when you have higher attack bonuses and better gear.
However, if you can effectively use it at level 4, you will be able to easily kill most of the enemies you encounter, especially as it is easy to die in Act 1. So if you are up for putting in additional effort the benefits are immense. Here are the main ways to increase your attack rolls:
 Bless from Cleric or Paladin, for a 1d4 bonus.
- Spells like
 Faerie Fire, and
  Blindness give an advantage to attackers.
 - Oil of Accuracy or Diluted Oil of Sharpness, for 1 and 2 attack roll bonus.
 Gloves of the Growling Underdog - can be obtained in Goblin Camp, and gives an advantage for attack rolls.
 Svartlebee's Woundseeker - early game greatsword that you can get before engaging in any of the major battles of Act 1.
Now, if you want more in-depth information, I have a guide covering how to increase attack rolls, which lists a lot of options and combinations. You can then pick the bonuses based on your party setup.
Darkness Synergy with Dire Raven
At level 11, your Dire Raven can create ![]() Darkness fields by utilizing its
Darkness fields by utilizing its ![]() Fly mechanic. This can create some amazing synergies and give you a safe zone for yourself. It is also great to be used on enemies, to make them blinded.
Fly mechanic. This can create some amazing synergies and give you a safe zone for yourself. It is also great to be used on enemies, to make them blinded.
To get the most out of it, I recommend having blindness immunity with Ranger. There are plenty of items that provide this - ![]() Shar's Spear of Evening,
Shar's Spear of Evening, ![]() Eversight Ring,
Eversight Ring, ![]() Steelwatcher Helmet, etc.
Steelwatcher Helmet, etc.
Maximizing Companion amount
Once you reach level 11, your beasts will get additional actions and they allow summoning more lesser beasts. For example, to get the maximum amount of those you can do:
- Summon Bear
- Activate
 Ursine Reinforcements
 - Dismiss the main bear
- Short Rest
- Summon Dire Raven
- Activate
 On Black Wings
This will not be a huge game-changer, but it can be useful to have additional distractions in late-game battles.
Buffing your companions
An important aspect of making the companions useful is buffing them up. Here is the list of spells and consumables:
- A cleric or other support character that can cast
 Mass Healing Word while wearing
  The Whispering Promise and
 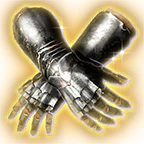 Hellrider's Pride or
  The Reviving Hands.
 - An alternative is the Bless spell.
 Longstrider buff
 Aid or
  Heroes' Feast for bonus HP.
Early Game Combat
Let's cover how you should progress combat levels 1-6.
- Early game combat, is somewhat standard Ranger. You use
 Hunter's Mark and attack with your two-handed weapon. This will also buff your beasts.
 - If there are multiple clustered enemies, you can use
 Spike Growth to greatly damage them before they reach you.
 - Be sure to increase your attack rolls with Advantage or other ways to effectively use
 Great Weapon Master: All In Effect.
 - Summon Raven familiar with
 Find Familiar.
 - From level 3 utilize your beasts with
 Ranger's Companion.
 - I would recommend precasting Phalar Aluve: Shriek before combat so that you would save the action point and attack on the first turn.
Late Game Combat
Overall, nothing much changes from the early game, just that your beasts get buffed up.
- If using Dire Raven, make sure to create
 Darkness fields every turn, so that enemies would have a hard time moving around or attacking you.
 - If using
 Bhaalist Armour your ravens will deal double damage from
  Aura Of Murder.
 - Use spells only with a second action point (if
 Haste) or evaluate carefully if it's worth over 2 attacks.
Build Variations
There are a few variations that the build could be changed about. I think it is more for advanced players who are likely doing some deeper optimizations.
| Setup | Description |
|---|---|
|
I like this setup as it can be used as an alternative to Druid or Cleric who have |
|
This setup gives additional utility cantrips like |
Conclusion
Thank you for reading the best Beast Master Ranger build for Baldur's Gate 3. Although it is not a powerhouse as some top-tier builds, it's still a solid and interesting take to find synergies with your beast companions.
Cheers!
Discussion
Appreciate your work, but after beating a game with this build gotta say it's pretty dull. Beasts are just not worth it and ranger skills are weak and costly. For me it all went down to just 2 attacks with nyrulna in bhaalist armor. Although 1 lvl sorc multiclass was very cool improvement in terms of dialogue options and shield spell.
Thanks, yeah it's not a flashy build like Bardadin or Storm Sorcerer. However, it does server a role that no other build can do as well - setting up Darkness at level 11. The Dire Raven is mandatory for any party going for Darkness setup. Otherwise I agree to some extent with your points and keep this build in a lower tier on the tierlist :)